Creating USAS Report Bundles
This document details one of the many ways to create and customize reports and report bundles.
Create Account Filter
You may create an account filter for the accounts that need to be included on the report(s). You may use an existing Account Filter if one exists.
- Go to Utilities/Account Filter
- Click on Create
- Enter required information:
Filter Name: Enter the name for the filter.
This will be used later on in your report options.Account Filters: Click on + to add accounts and check all boxes that apply for access.
- C = Create which allows the user to create accounts for that filter
- R = Read which allows the user to view the accounts for that filter
- U = Update which allows the user to modify accounts for that filter
- D = Delete which allows the user to delete accounts for that filter
- P = Preencumbrance which allows the user to post requisitions against that filter
- E = Encumbrance which allows the user to post purchase orders against that filter.
- Click Save


Create 'Save and Recall' on a Report
- Go to the Home page or Report/Report Manager
- Click on the Generate beside the desired report.
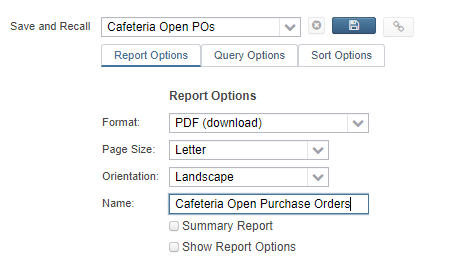
- Select/enter report criteria
- Format - the type of output for the report
- Page Size
- Orientation
- Name - appears at the top of the report
- Check mark if you want a Summary
Check mark if you want to 'show report options'
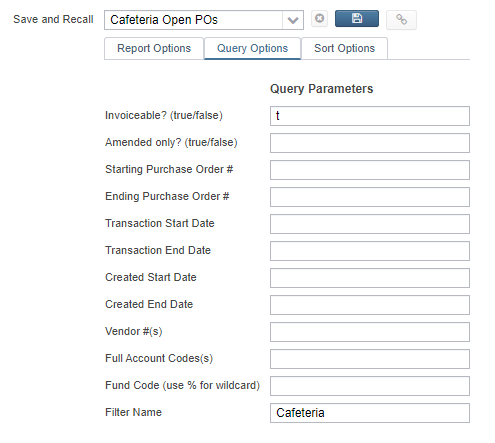
Populate desired query parameters such as Filter Name
- Under Selected Properties drag and drop the properties in the order you want to sort by, choosing to control break (sub total), page break, etc.
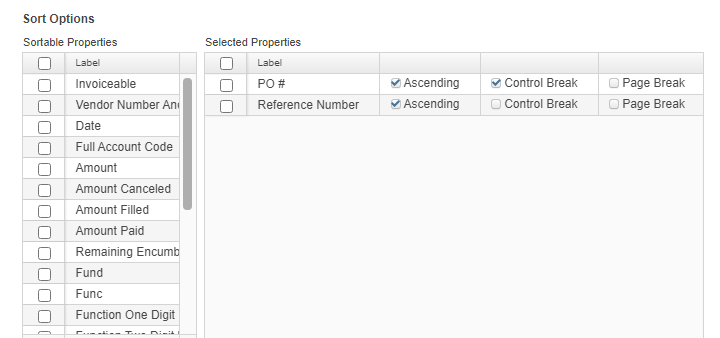
- Under Selected Properties drag and drop the properties in the order you want to sort by, choosing to control break (sub total), page break, etc.
Click inside the 'Save and Recall' drop down and enter a Name. Once the name is entered tab off that field and the blue save will be active click on it to save all the report options.
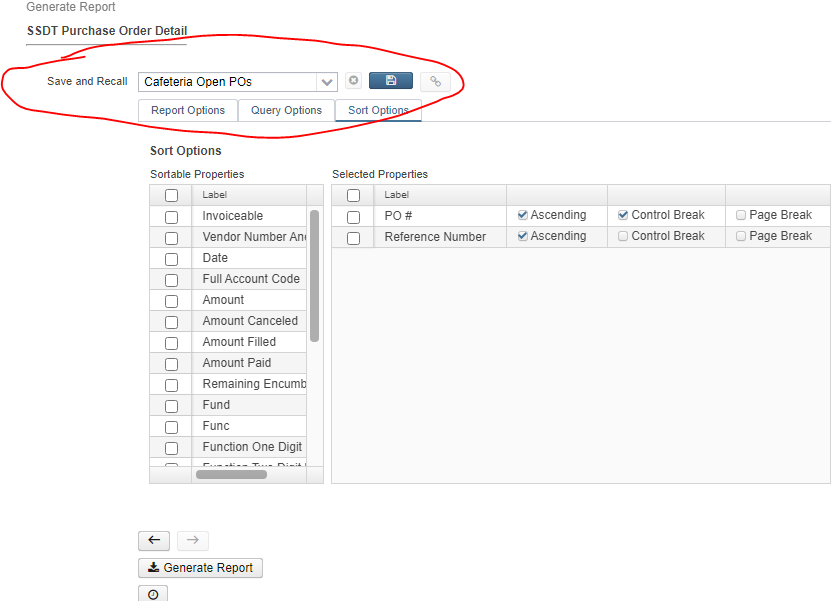
- Generate the Report or Close out of generate pop up window.
- Select/enter report criteria
- Click on the Generate beside the desired report.
Create a Report Bundle
- Go to Report/Report Bundles
- Click on Create
- Enter required information:
- Report Bundle Name: Name of the Report Bundle that will show in the grid and on scheduled Report Bundles
- Description: Option to add additional description detail that will show in grid by default
- Tag (optional): Tags are user-defined words that mean something to the user to help categorize report definitions. For example, a tag could be 'YEAREND' or 'MONTHLY' reports. Then they can use these tags for several other reports , enabling them to search for them easily in the Grid
- Create a bundle of Reports
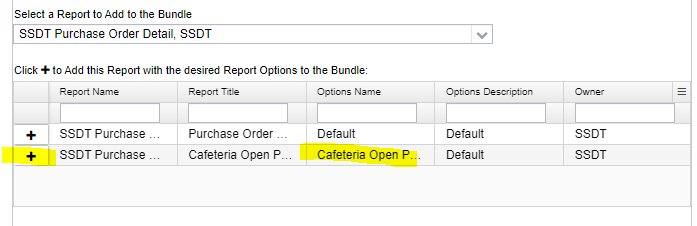
Click on the drop down under 'Select the Report to Add to the Bundle'
Any report currently in your Report Manager Grid (ones you have created, shared with, imported, and SSDT templates) as well as 'canned reports' may be included in the report bundle.
Once selected the Report will show under Click + to add this report with the desired Report Options to the Bundle. Use the + to select which version of the report to add to the bundle. The report will then show under the 'Reports Currently in the Bundle'
It will show one row for each saved parameters (created from the 'save and recall') that exists for the report.
You may modify the report parameters for the reports included by clicking on the icon next to the report in the grid at the bottom of the window.
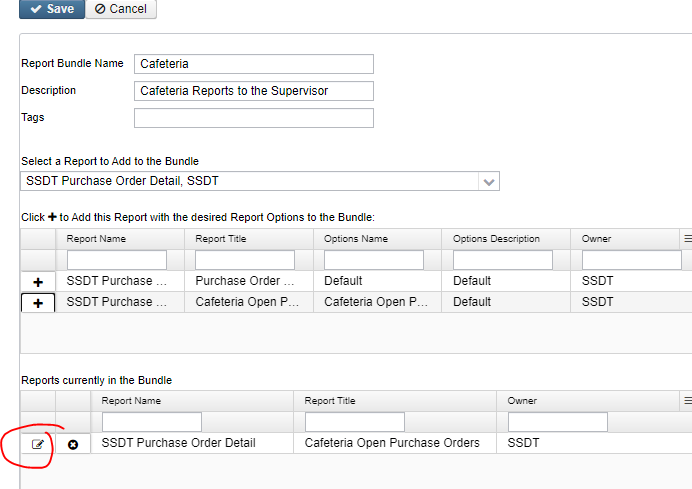
Add as many reports as needed, starting from the 'select the report to add to the bundle' drop down.
- Click on Save
Schedule the Bundle
- In Report/Report bundles
- Click on the 'clock' icon.
- Enter the required information"
- Job Type: Select 1 of 3 job type options to determine when the report bundle will generate. The parameters below will change based on which job type option is selected.
A Cron Expression is a command set up to run periodically at fixed times, dates, or intervals
Cron Expressions can be set up by using a free online cron expression generator:
Once the Cron Expresssion for the preferred interval has been generated, copy and paste or type the cron expression into the Cron Expression field.
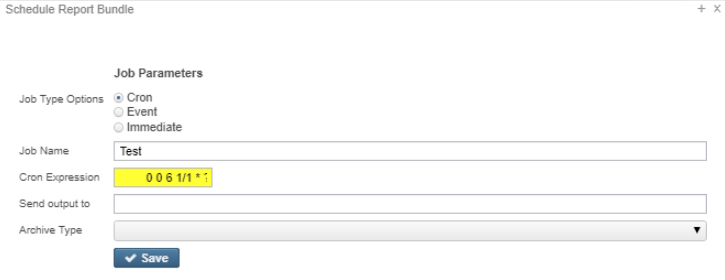
Job Name: Defaults to what is displayed in the 'Name' parameter. You can overwrite the default job name.
If the report is scheduled using the Cron option, the Job Name must be unique for each scheduled job.
- Send output to: This can be the email of the intended recipient or a path to the File Archive.
- You may enter multiple email addresses by separating each with a comma.
- Path to the File Archive will send the Reports to a specific section of the Utilities/File Archive
- Archive type: Determines if reports in bundle will be combined and sent together or sent in individual notifications for each report chosen.
- Send a single notification with multiple attachments (One email with multiple attachments)
- Send a multiple notifications with a single attachment (Multiple emails with a single attachment in each)
- Job Type: Select 1 of 3 job type options to determine when the report bundle will generate. The parameters below will change based on which job type option is selected.
Click Save
The scheduled job w ill be listed under Utilities/Job Scheduler.