Click this link to go to PowerSchool's instructions.
Below are instructions given to NWOCA by West Unity:
Part 1: Enable PowerSchool SIS as OIDC Service Provider
The first step in setting up PowerSchool SIS as OIDC Service Provider is to enable the plugin.
On the start page within the PowerSchool SIS Admin portal, choose System in the main menu.
Click System Settings.
Click Plugin Management Configuration.
Select Enable/Disable next to PowerSchool SIS as OIDC Service Provider.
Click Enable.
Part 2: Set up the Google OAuth
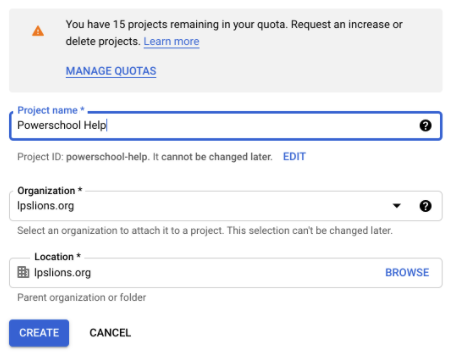
On the top left, next to "Google Cloud Platform," select "New Project" or click the down arrow and in the box that opens up click on "New Project."
Give your project any name you want.
Make sure that the org and location fields are set to your google domain and then click on "Create."
It will take a second but there should be a notifications box that pops up on the next screen that says something about creating your project. Once it's done, open your project.
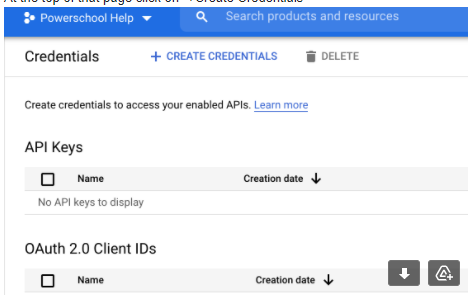
On the left side, click on "Credentials."
Then click on "Configure Consent Screen."
For "User Type" select "External" and then "Create"
Give your app a name like powerschool or something. Enter your email in the support email field and add a Logo if you want.
For the App Domain section, put your school website address in the first field and don't worry about the other two fields.
For "Authorized Domains" click on "Add Domain" and enter the name of your Google domain "elginacademy.org". If you have an ITC partner, add their domain name as well (ie http://nwoca.org ).
And then in the last field on the page, put your email address and click on "Save and Continue."
The next page is just to let your users know what information Google will be looking at. You don't have to put anything here at all. So click on "Save and Continue." and on the next screen click on "Back to Dashboard."
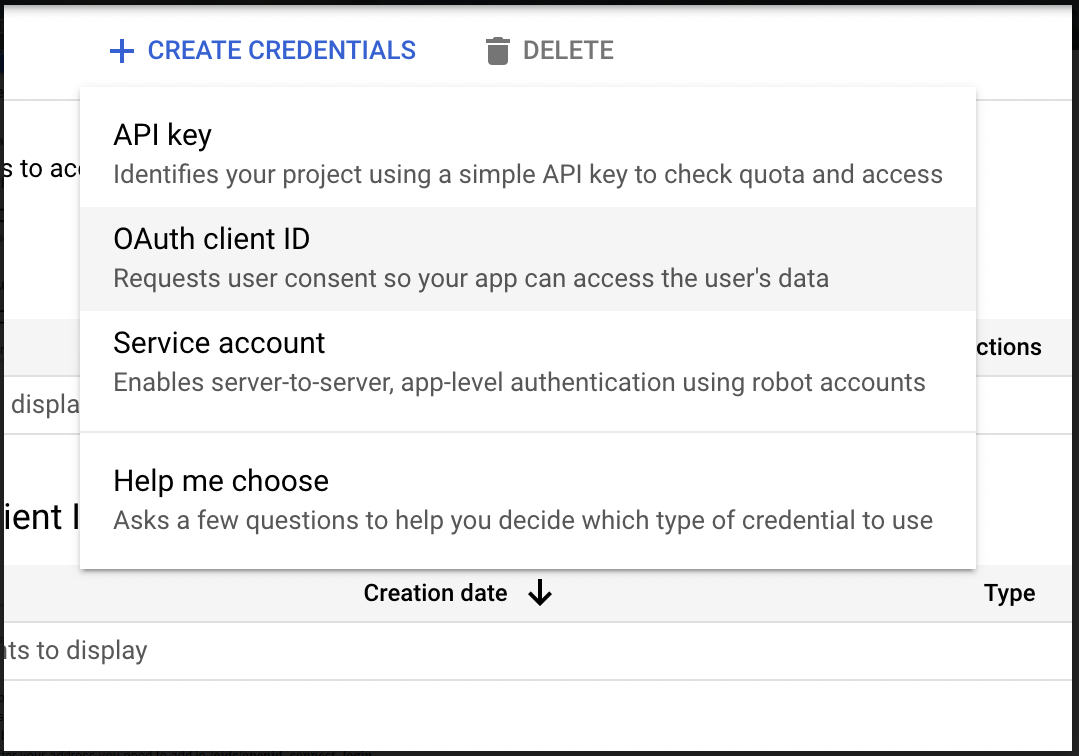
NOW. On the left of the screen, click back on "Credentials."
At the top of that page click on "+Create Credentials"
Click on "OAuth Client ID."
For "Application Type" select Web Application and give it a name.
In the section at the bottom that says "Authorized Redirect URIs," click on "Add URI"
In that box, they want you to enter your powerschool address. Our is https://louisvillepublicschools.powerschool.com
BUT after your address you need to add in /oidc/openid_connect_login
I don't know what your PS address is, but it would look something like this when it's done..... https://elginacademy.powerschool.com/oidc/openid_connect_login
Then click on "Create."
Copy the Client ID and Client Secret to a word document or something so you can copy and paste it later.
Part 3: Link Google to Powerschool
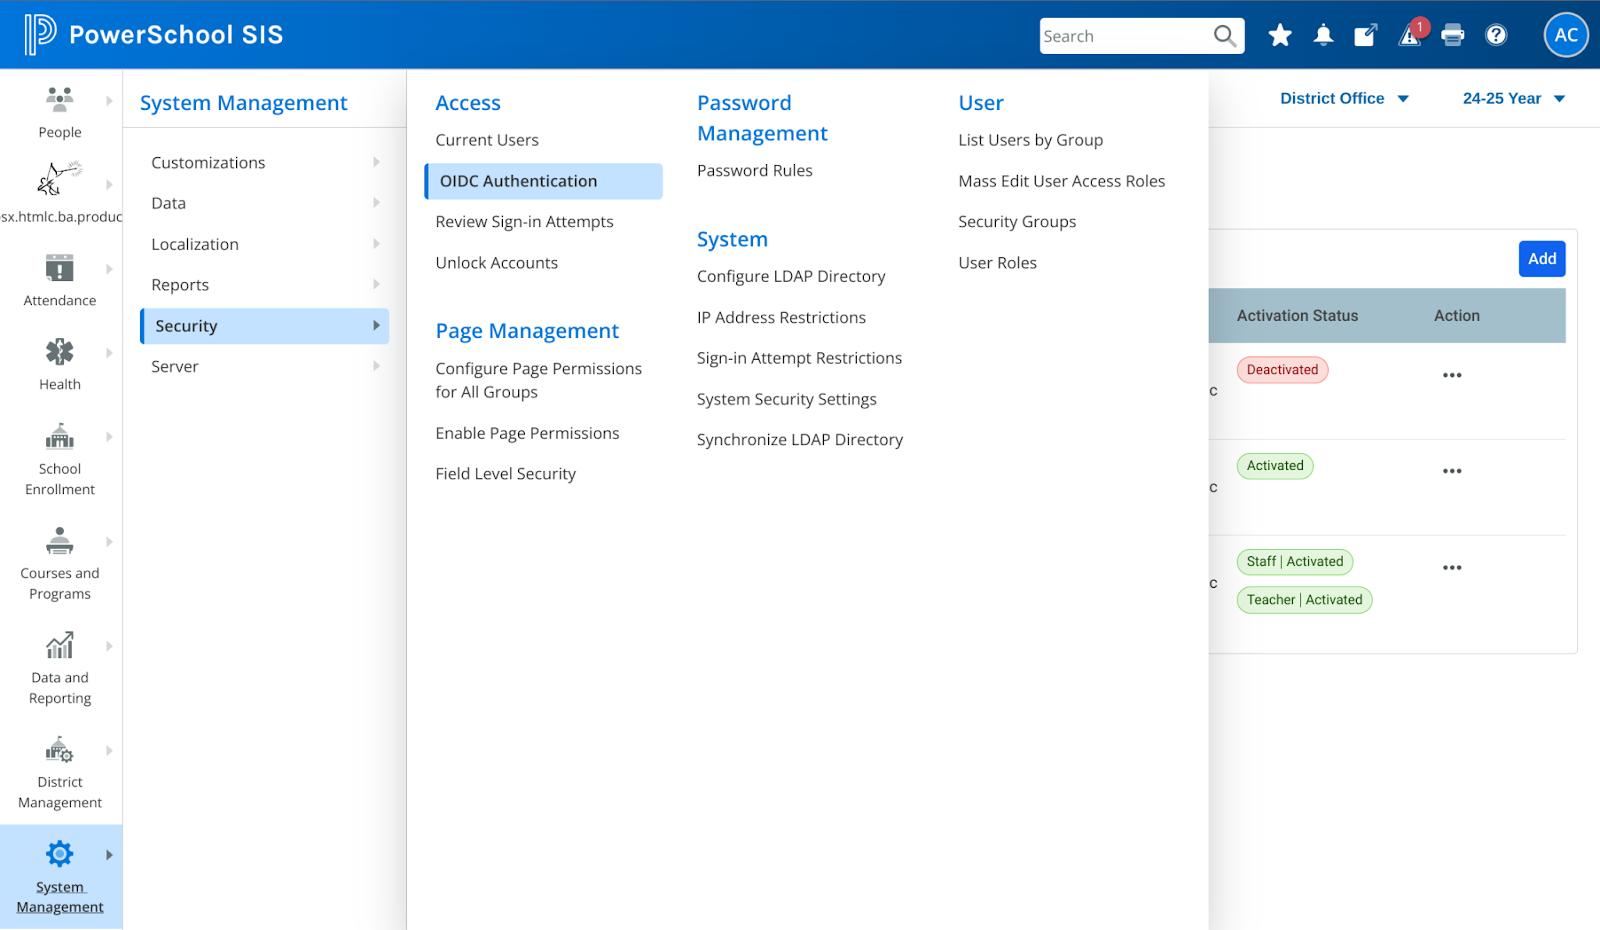
On the start page within the PowerSchool SIS Admin portal, choose System in the main menu.
Click OIDC Authentication Setup.
Select Enable OIDC Authentication.
Enter the IDP URL:
For Google, https://accounts.google.com
Enter the client ID and client secret provided by the IdP (this is what you copied from the Google OAUTH step)
Enter Scopes. Separate multiple entries using spaces.
For Google, openid email.
For Authentication ID / Identifying Claim, enter the IdP claim that will be used to match SIS users.
For Google, it is suggested to use the email claim.
Caution: Do not select any of the Enable OIDC Authentication for Users settings at this time.
Click Submit.
Part 4: Link Google to the Powerschool Mobile Apps (Optional)
Repeat Step 3.
Use the global configuration settings to enable SSO for the PowerSchool Mobile app:
|
Part 5: Link Faculty Accounts to Google Accounts
Log in to Powerschool Administrator and make sure you're at the District level. If you're not, you should be able to click that little down arrow and switch over. And if you can't, just pick a school and go that route.
On the left hand side of the screen, scroll down to "System Management" and click on "Security."
On the next screen, scroll down to "Security" and select "OIDC Authentication Setup." (You've already been here before)
If the box next to "Enabled..." isn't blue, go ahead and enable it.
Let's start with the Teacher users. Click on the box next to "Enable OIDC Authentication for Teachers." You're turning on Google auth for ONLY teachers right now since you don't have that many.
Scroll down that page and click on "Submit."
Then click on Powerschool SIS up at the very top to go back to the start page.
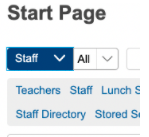
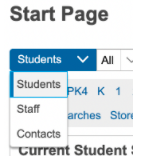
Change the search drop down to "Staff"
Select "Teachers."
That will bring up a list of all of your teachers. Click on the first one listed.
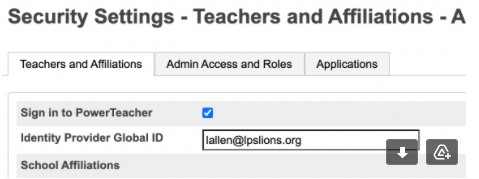
On the left side of the screen, select "Security Settings." This is where you change passwords and stuff.
Now, instead of the password field that you used to see, you'll see "Identity Provider Global ID."
This is where you match up the user and their Google email address and the reason we had to do that step in Google Cloud. For an ITC partner, you would put their domain email too, matching the email domain you added in Google Cloud.
Once you enter the email address click on Submit and go to the next teacher by clicking the right arrow on the top left corner of the screen.
Repeat the process for each person. Assuming you have a teacher account AND a PS admin account, you can safely change this for you without affecting your ability to sign in. It's also one of the reasons that I didn't enable Google SSO for my staff section. That allows me to enforce some different password rules for that group. You can test if it works by going to the teacher login page for your PS instance and it should be a google login now.....hopefully. Sign in with your google stuff and make sure you see your name. That should be it.


As shared by: (8/2021)
Nate Simons
Director of Technology
Esports Coach
Louisville Public Schools
Edits made by Alex Cummins
Millcreek-West Unity Schools
07-31-2024